
Primer 101: When to Use It and When to Skip It
|
|
Time to read 11 min
|
|
Time to read 11 min
Have you ever found yourself standing in the paint aisle, gazing at countless cans of primer, and wondering,
"Do I really need this stuff?"
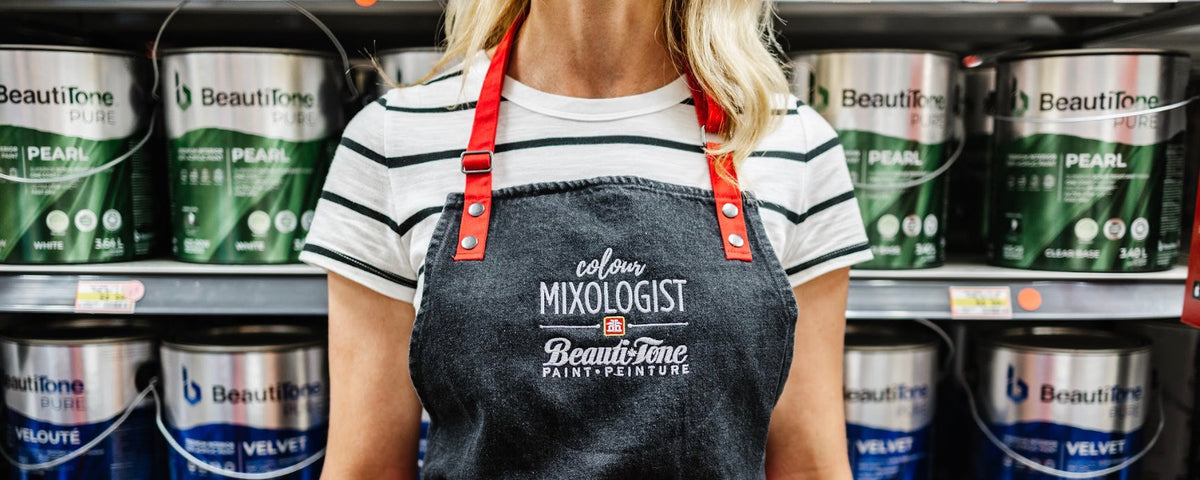
Well, I get it—I've seen many of our customers at our Home Hardware struggle with this when standing in front of the cans of BeautiTone primers. And even though I've learned quite a bit about primer during my Decorating and Paint Colour Consultant courses, it wasn't until I attended a recent BeautiTone paint seminar that I truly got “schooled” in the subject.
To be honest, when I saw 'Primer' on the agenda, I briefly contemplated some Pinterest time scrolling on my phone. But as soon as the BeautiTone reps began talking about primer, my attention shifted, and I found myself more and more intrigued. And by the end of the seminar, I was excited about sharing what I learned with our staff and our customers.
So I'm here to help take the confusion away and shed some light on what primer is, when you need it, and when you can skip it. So that the next time you're at the paint counter, you'll be able to CONFIDENTLY decide whether or not you need primer for your paint project.
Primer can be a very important first step in the painting process. It serves as a neutral base coat, specially formulated to prepare the surface for the paint (aka the “top coat”).
The primary role of primer is to enhance paint adhesion and longevity, making sure your paint job looks great and stands the test of time. In other words, it’s designed to stick.
Paint is made to protect the surface and, if I have anything to do with it, add the most beautiful colour to your living space, but it’s function is not to “attach”.
Primer on the other hand has a high resin count, allowing it to adhere strongly to the surface, fill imperfections, smooth out unwanted textures and seal porous surfaces! It helps to “FIX AND STICK”.
When you use primer, it may feel like you’re just adding more work to the overall job – but it can sometimes be as important as applying the final colour coat. Every brushstroke and roller roll during priming can set the stage for a smooth and flawless colour coat and it can also SAVE YOU MONEY in the long run. So keep reading!
Understanding when to use primer is like having an ace up your sleeve for your painting project. Here are the scenarios where primer should be used:
When you're dealing with porous surfaces think of that area like a sponge - it will soak up that paint faster than you can apply it!
Porous surfaces like new or unprimed drywall, bare wood, unfinished bricks/masonry, or newly repaired areas on a wall (spackle/compound) will benefit from a coat or two of primer. If you don’t take the time to seal a porous surface then you risk having a patchy finish when you apply the top coat. Primer seals the porous surfaces, ensuring your paint sticks as it should, creating a vibrant, lasting finish.
If you’re painting new unprimed dry wall then primer isn’t just a good idea, it is a MUST! Drywall is expensive and if you go ahead and paint it without first priming then it will have a patchy finish. Using a dry wall sealer will ensure uniformity in your paint sheen. The “BeautiTone Primer Solutions” latex “Primer Sealer" is a great product to use for new dry wall.
If your surface is glossy or has that extra shine, it needs some grip to it in order for the top coat to adhere correctly. Otherwise, the paint could just slide off or pool up on the surface. It might be prudent to sand the glossy surface to roughen the texture, but primer can save the day! It’s worth the extra effort for an even, smooth finish.
Keep in mind the BeautiTone brand sells a super adherent, problem solving primer called ”Stick-it” that sticks to “hard to stick” and glossy surfaces like steel doors, ceramic, glass, galvanized metal and melamine.
Changing your wall's colour from dark to light? Primer is your best friend. Applying two coats of white primer can prevent the previous dark colour from affecting your new, lighter shade. Conversely, when moving from a light to a dark colour, a tinted primer can bring the wall finish closer to your desired colour, reducing the number of primer and colour coats.
Going from an oil-based paint to a water-based one or vice versa can be tricky.
A primer bridges the gap, making it possible to switch paint types without issues.
The risk of using latex paint over oil-based paint is that the new coat of paint won’t adhere and will end up peeling off. Now that would be very frustrating, especially if it could have been avoided by first coating the wall with a primer!
Stains and spots are the enemies of a flawless paint job. Primer, especially thicker options, can effectively conceal these imperfections, ensuring they don't ruin your new paint job.
Unsealed stains like water stains, marker, lipstick, food or red wine can bleed through the paint over time and ruin your new paint job so priming is important. Two coats will likely be needed but it’s worth the effort. Keep in mind a stain blocking primer doesn’t cover over the stain, it holds it in, so you must follow it up with your top coat (paint) to get a beautiful finished result.
If stains are annoying, smelly odours are even worse! A fresh coat of paint, even if you wash down the walls first, will not cover up odours like smoke, making a primer to seal it a no-brainer.
BeautiTone makes an amazing primer for stains and odours called “Block-it”. It blocks the toughest stains including graffiti, crayon, ink, lipstick, food and seals for smoke and water damage. It also blocks persistent odours from food, pets and smoke.
If you want to ensure professional quality results then using a primer is worth it to ensure you don’t end up having to deal with bubbling, cracking, blotchiness, peeling, or stains bleeding through. That being said, there are some instances when primer may not be necessary:
If your walls or woodwork are already painted in a low lustre sheen like an eggshell finish (so not glossy), and the surface is in very good condition, with no stains or odours, then you may decide to skip the primer step. Just ensure the existing paint surface is clean and well-adhered.
A good practice is to clean the walls first with a TSP product, especially if you have a wood stove, but just be sure to follow the directions on the bottle carefully since most of these products require you to rinse well after washing with it.
We like this product by Natura called “Safe Prep” to clean our walls before priming!
If you're painting a wall with a similar colour or making a minimal colour change, primer may not be necessary. Your new paint will cover the existing colour effectively.
You may consider skipping primer if you're working with a self-priming paint. These two-in-one products, also called self-priming paints, contain a higher percentage of solids, resulting in a thicker coat. Self-priming paints work best over similar or lighter colours and are ideal for smooth walls in good condition. However, they may take longer to dry than regular paint.
Primer is not typically used on floors. Most paints formulated for floors are designed to adhere directly to the surface.
When it comes to selecting the right primer for your project, understanding the different types of primers is crucial. Here's a quick overview of the main types:
Oil-based primers are versatile and work well with various paints, including both latex and oil-based paints. They are known for their excellent stain-blocking properties and are often used on surfaces with challenging stains or odours. However, they tend to dry slowly and can emit volatile organic compounds (VOCs), so proper ventilation is essential when using them and you will need to have paint thinner or turpentine on hand for clean up.
You may wish to consider a shellac primer if dealing with a serious primer jobs, such as stubborn stains, smoke damage, or persistent odours. Shellac primers seal the surface and provide superior coverage but also release a strong odour, so ensure proper ventilation and consider them for specific problem-solving situations. When using this type of primer it’s imperative you follow the manufacturer’s instructions and be sure to have the right solutions on hand to clean up afterwards.
Latex and alkyd enamel based primers are a user-friendly option. They come in low- or no-VOC varieties, making them a more environmentally friendly choice. They work well on drywall, wood, brick, and other materials. While it’s easy to clean up afterwards using water, they may not be as efficient at covering up tough stains compared to other primers. Be aware that latex can soften stucco so you will not want to use this type of primer on that type of surface.
Priming a surface may sound like a daunting task, but with the right approach, it becomes a manageable step in your painting project. Here's a simplified guide to applying primer effectively:
The surface should be clean, dry, and free from any dirt, dust, or loose paint. Repair any imperfections or damage, such as cracks or holes, by using spackle. Spackle is a handy paste that fills in these imperfections, creating a smooth surface. Once the spackle dries, don't forget to lightly sand the area with a finishing sandpaper (120 grit) to ensure a seamless texture. This step is crucial for achieving a flawless finish during both the primer and topcoat application.
Before applying spackle, use a bright light source, like an LED work light or headlight, to thoroughly inspect the wall. The light will reveal imperfections that might be less visible under regular lighting, ensuring you catch and repair all flaws. This technique can make a significant difference in the final result of your painting project.
The choice of whether to brush, roll, or spray on primer depends on your specific project, the surface you're working with, and your preferred application method. Here's a general guideline:
Brushing is excellent for precision and getting into corners or tight spaces. It provides good control and is well-suited for smaller projects or touch-ups. Use a high-quality stiff brush with soft bristle ends for best results.
Rolling is efficient for larger, flat surfaces such as walls or ceilings. It covers more area in less time compared to brushing. Select a suitable roller nap for your surface – longer naps for textured surfaces and shorter naps for smooth surfaces.
Spraying primer offers a quick and smooth coverage, often favoured by professionals for its efficiency. To get the best results, consider the primer's thickness and the sprayer tip size. It's generally better not to thin the primer, so opt for a larger sprayer tip.
Keep in mind that this method requires extra equipment and protective measures for the surrounding area, making it a choice some prefer to leave to the pros.
Apply a thin, even coat of primer.
Start with the edges and corners, known as "cutting in," using a brush. Or you can use an actual paint edger - a very handy tool for painting your walls!
Then, you can use a roller or brush to cover the larger areas. This is when I find a paint roller extension pole to come in handy for reaching up to the ceiling!
Be sure to save your floors and make the clean up job much easier by using a dropcloth!
Typically, applying one to two coats of primer is adequate. However, challenging situations like stubborn stains or rough or very porous surfaces may require up to three coats. A light weight sanding in between your primer coats (220 grit) will ensure a smooth finish on your walls. When sanding it’s a good practice use a drop cloth or sheet to catch the dust. Let it settle and carefully fold it up and remove it before you start painting to ensure there’s no dust in the room.
Different primers cure at different rates so be sure to follow the manufacturer's guidelines for specific drying times. Typically, an hour or two is sufficient. Depending on the surface and the primer type, you may need to apply a second or even third coat for complete coverage.
Once the primer has dried, lightly sand the surface with lightweight sandpaper (220 grit) to create a smooth texture. Take this opportunity to inspect the surface for any defects, as they may become more apparent when applying the topcoat.
After completing the primer application, thoroughly clean your brushes and rollers with the appropriate solvent or water, depending on the type of primer you used.
Be sure to follow the cleaning instructions on the product's label and have the appropriate cleaning substance on hand!
After completing the primer application, thoroughly clean your brushes and rollers with the appropriate solvent or water, depending on the type of primer you used.
Using primer can actually save you money! Primer, which contains more resins and fewer pigments compared to paint, used as a base coat helps the paint stick better. Also, it reduces the surface's paint absorption, which means you'll require fewer paint coats for a smooth finish. This not only helps your project look great but also benefits your budget, especially since primer is typically less expensive than paint. It’s a win-win!
We hope this guide clears up any primer-related mysteries and gives you a better understanding of this important step in painting. Primer can be puzzling, but we're here to simplify things for you. With this new insight, you'll approach your next painting project with confidence.
And don't forget to check out the impressive BeautiTone primer lineup – they're fantastic options for your painting needs. And, as always, our friendly paint department team is just a paint can away if you need any advice.
Happy painting!